Before doing any work, you should setup your machine. First of all,
you need to have the Java Development Kit (JDK) version 8 installed on
your machine. If you do not, head
to Oracle download page and download the Java Development Kit version 8.
Version 9 (or leter versions) might give problems, so we should avoid them for the time being.
Instructions for Java users
-
Create a directory BDC on your computer which will
be the main directory for your homeworks. In this directory,
put the file build.gradle which you must
download here.
-
If you are working in the Virtual Machine you can
skip this step, as the software is already installed.
Install Intellij Idea (Community edition), version 2020 on your system
from this download page.
In the Installation Options dialog window, select 32-bit or
64-bit launcher, depending on your machine, and specify Java in the
Create Associations section. (For a more comprehensive guide you can
look at the
official install and set-up page.)
-
After installation is completed, you must
configure Intellij for a first run.
Launch Intellij. In the first startup screen choose not to import any settings.
In the second one (about user interface theme) choose
"Skip Remaining and Set Defaults". Then, in the third screen
select Open and
use the file selection dialog that pops up to select the
build.gradle
file contained in the directory you
created in Step 1, as shown in the following screenshot.
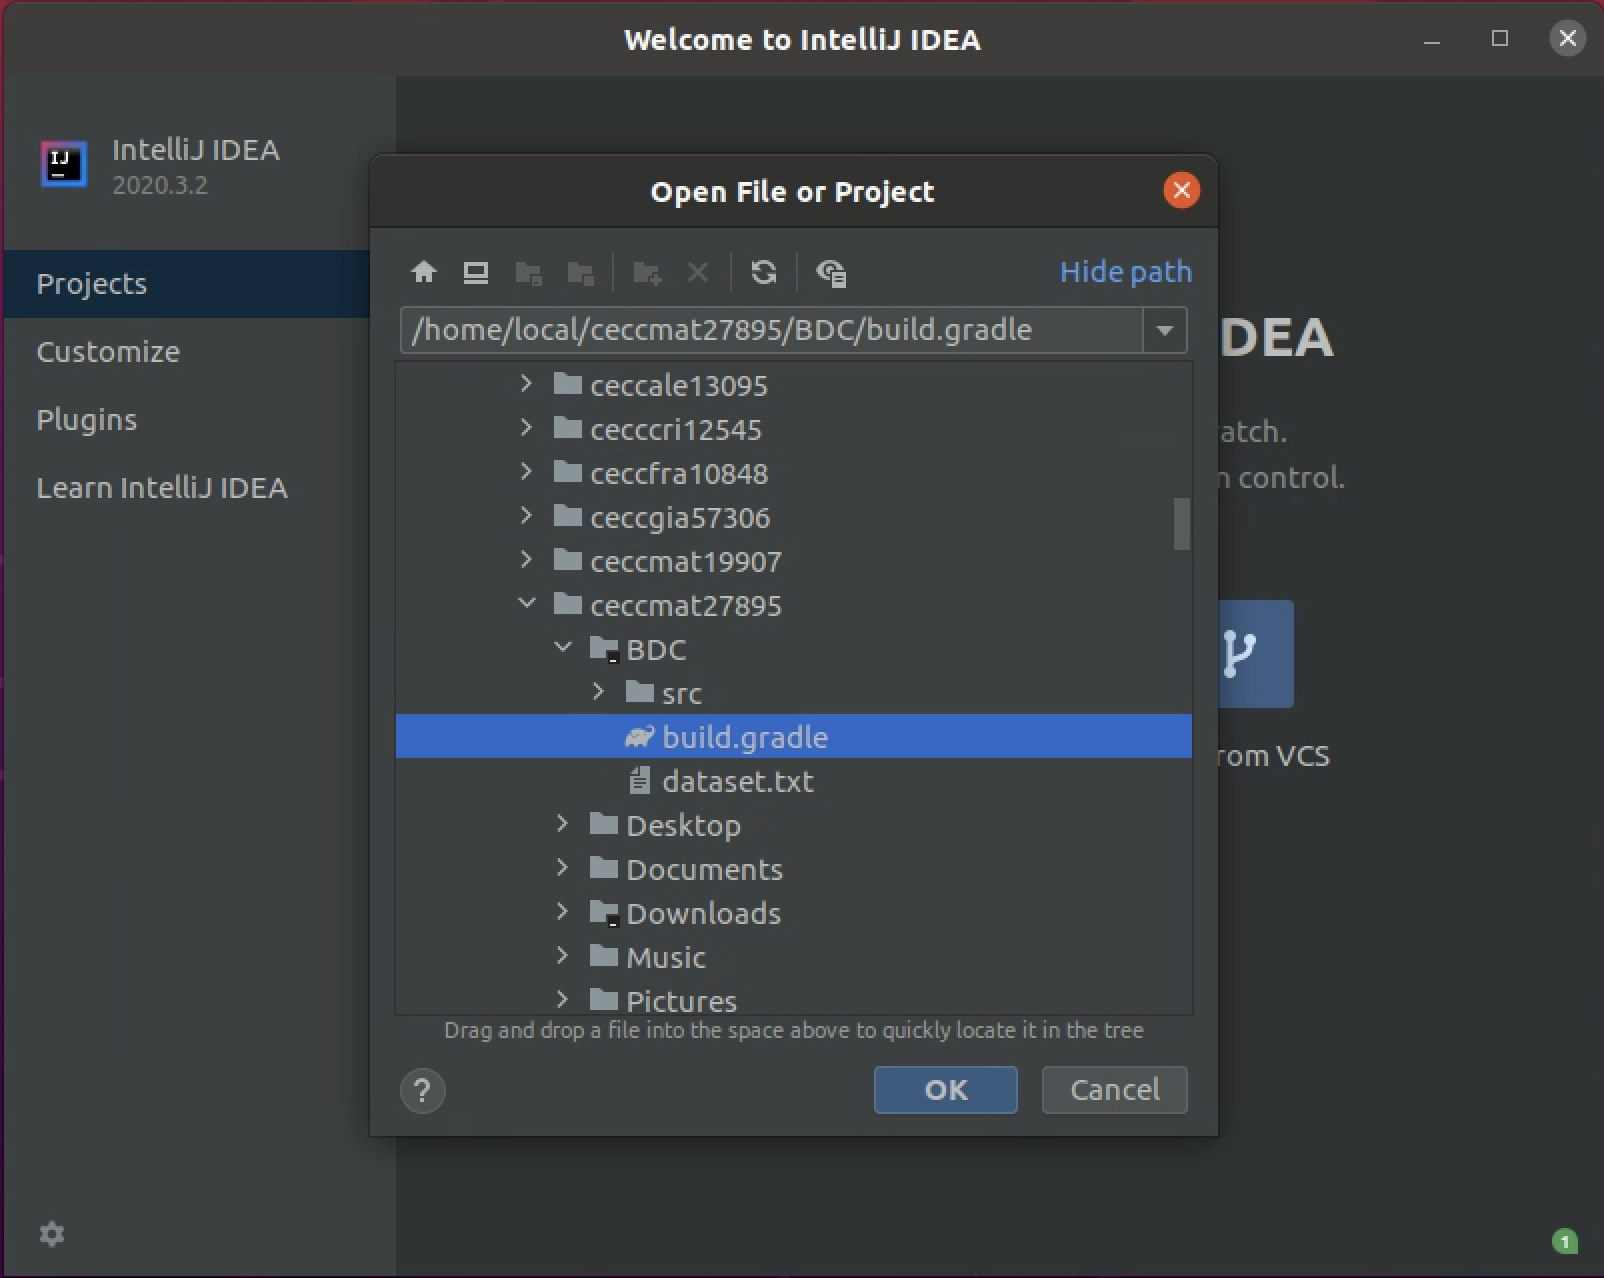
When prompted, you should click Open as project.
You will have to wait a couple of minutes until Intellij configures itself.
-
Create a directory BDC/src/main/java.
As a default, put all of your programs in
BDC/src/main/java, and all datasets that you want to provide
as inputs to your programs, in
the root directory BDC.
-
Use the project navigation panel on the left to open the files (e.g., programs,
datasets, etc.). Open a java program as in the following screenshot
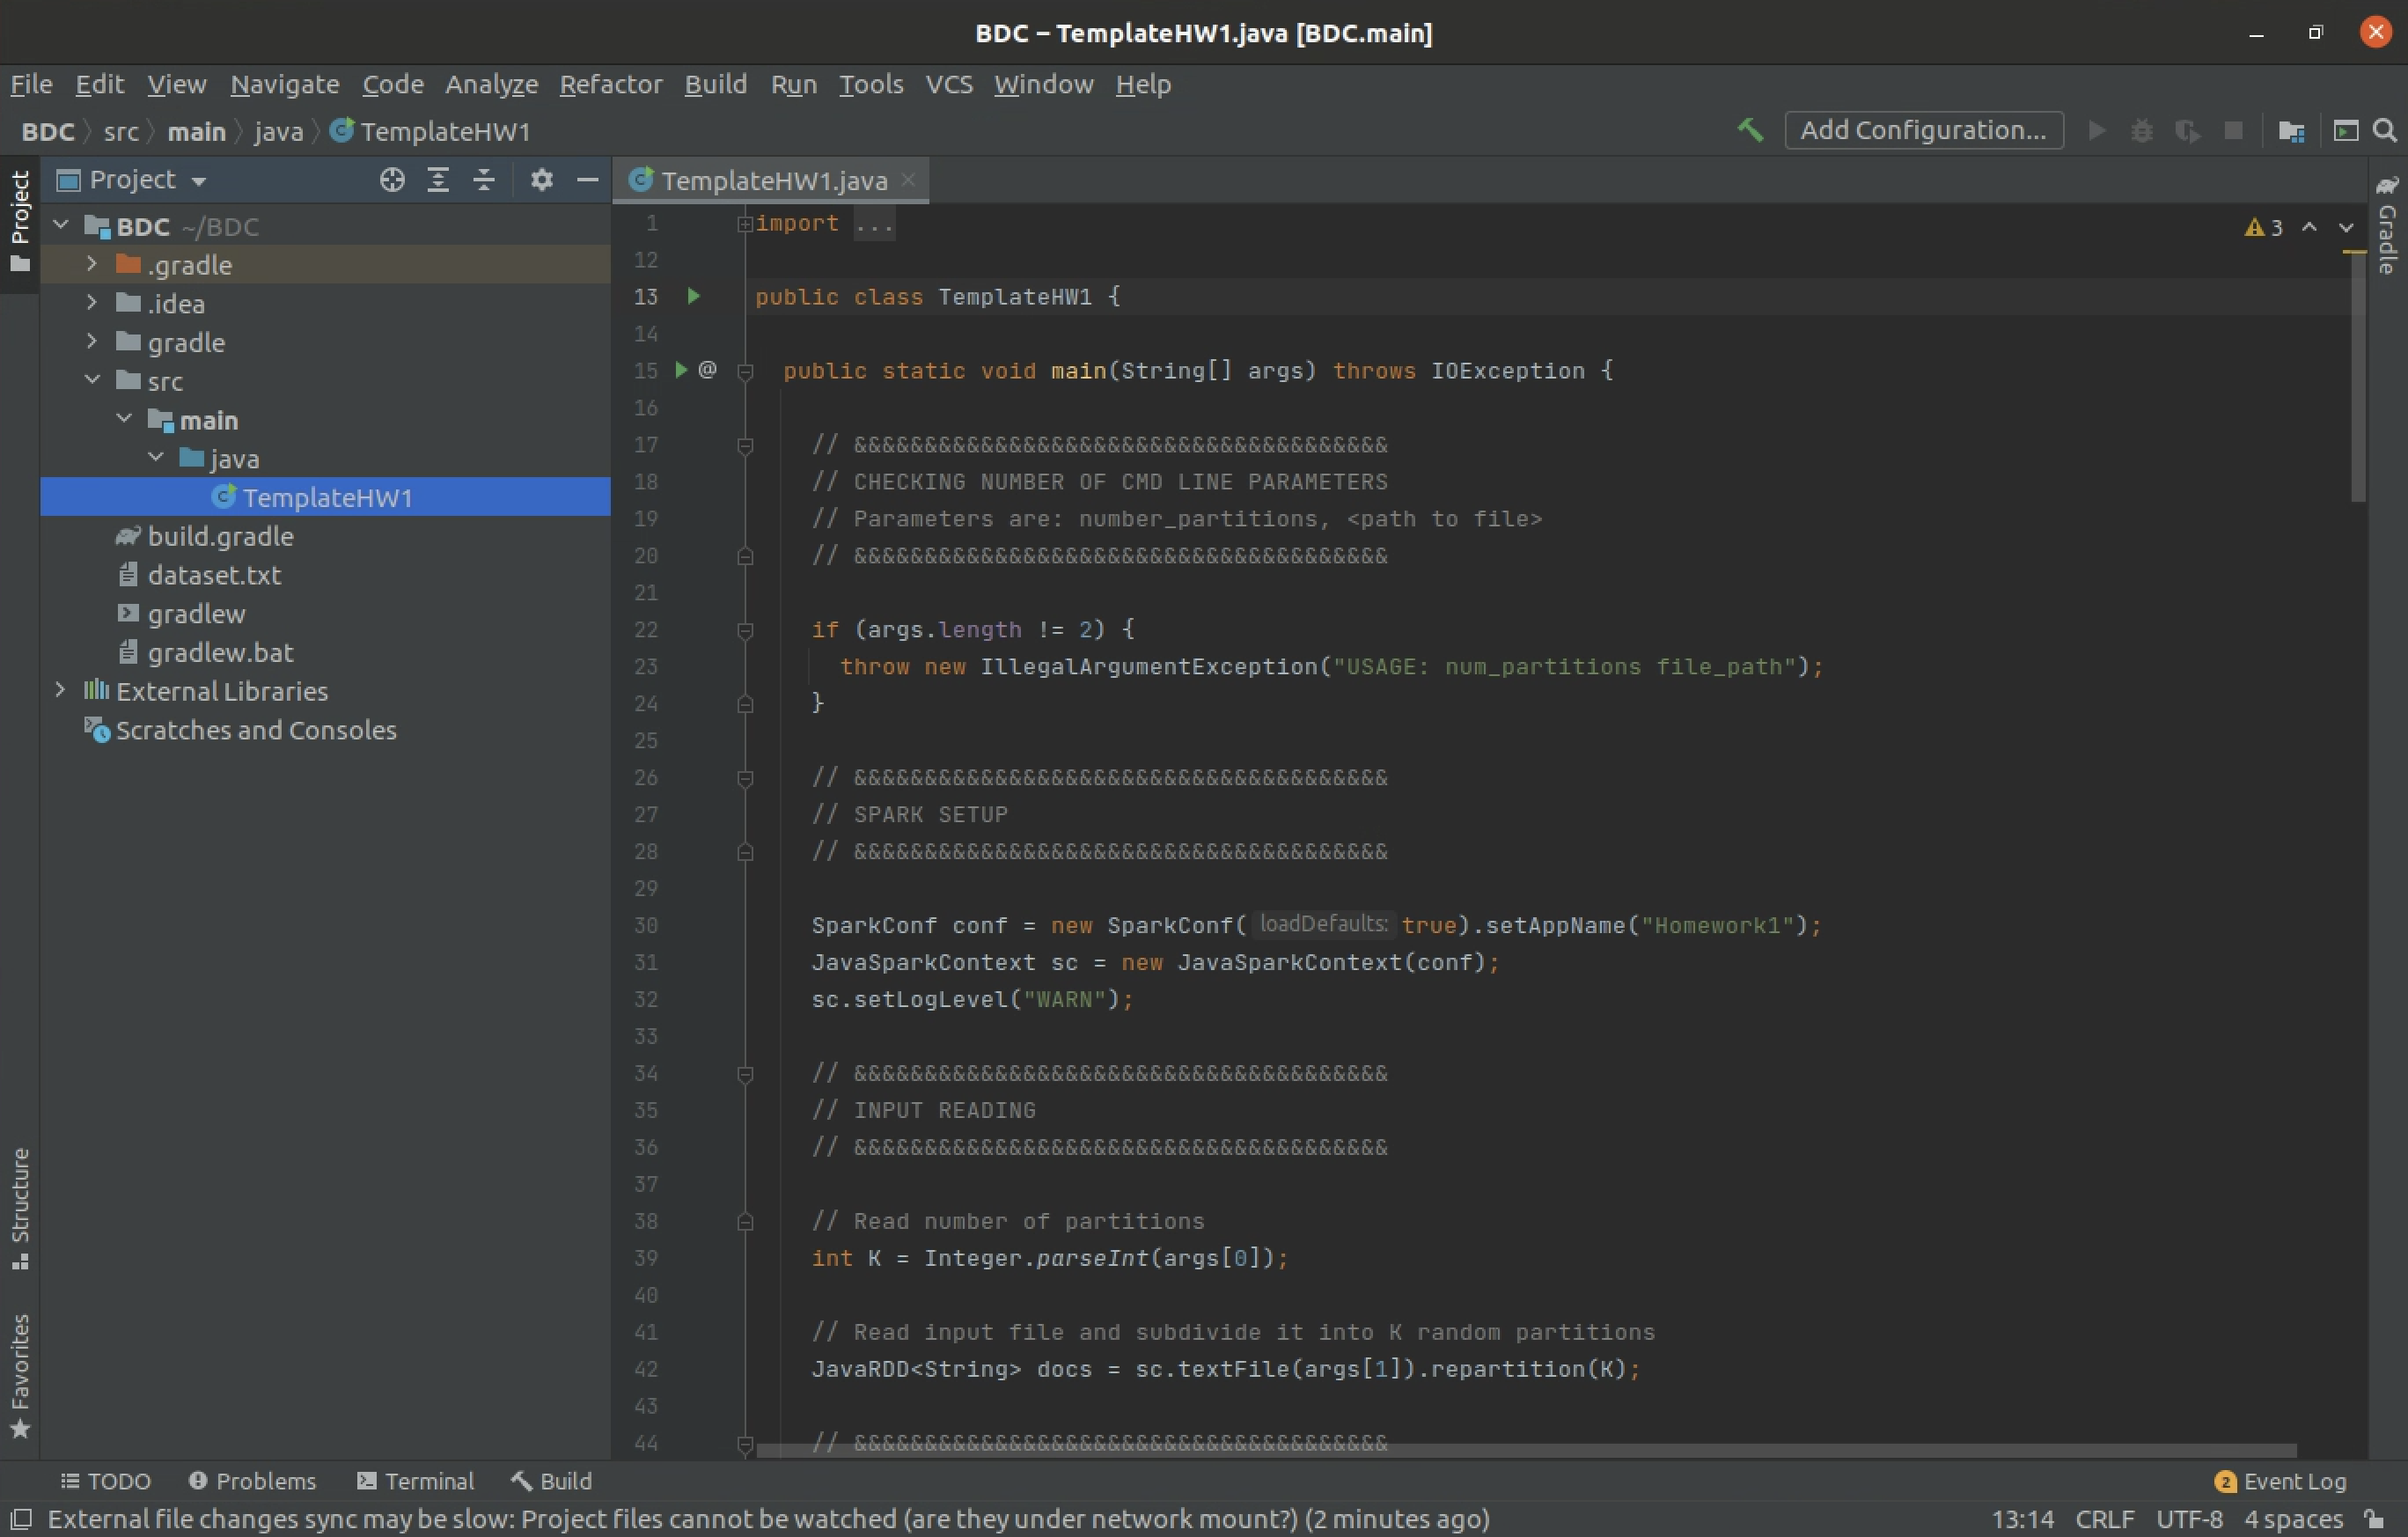
If the editor shows errors (in red),
this means that there is no Development Kit associated to the project.
To fix this problem,
-
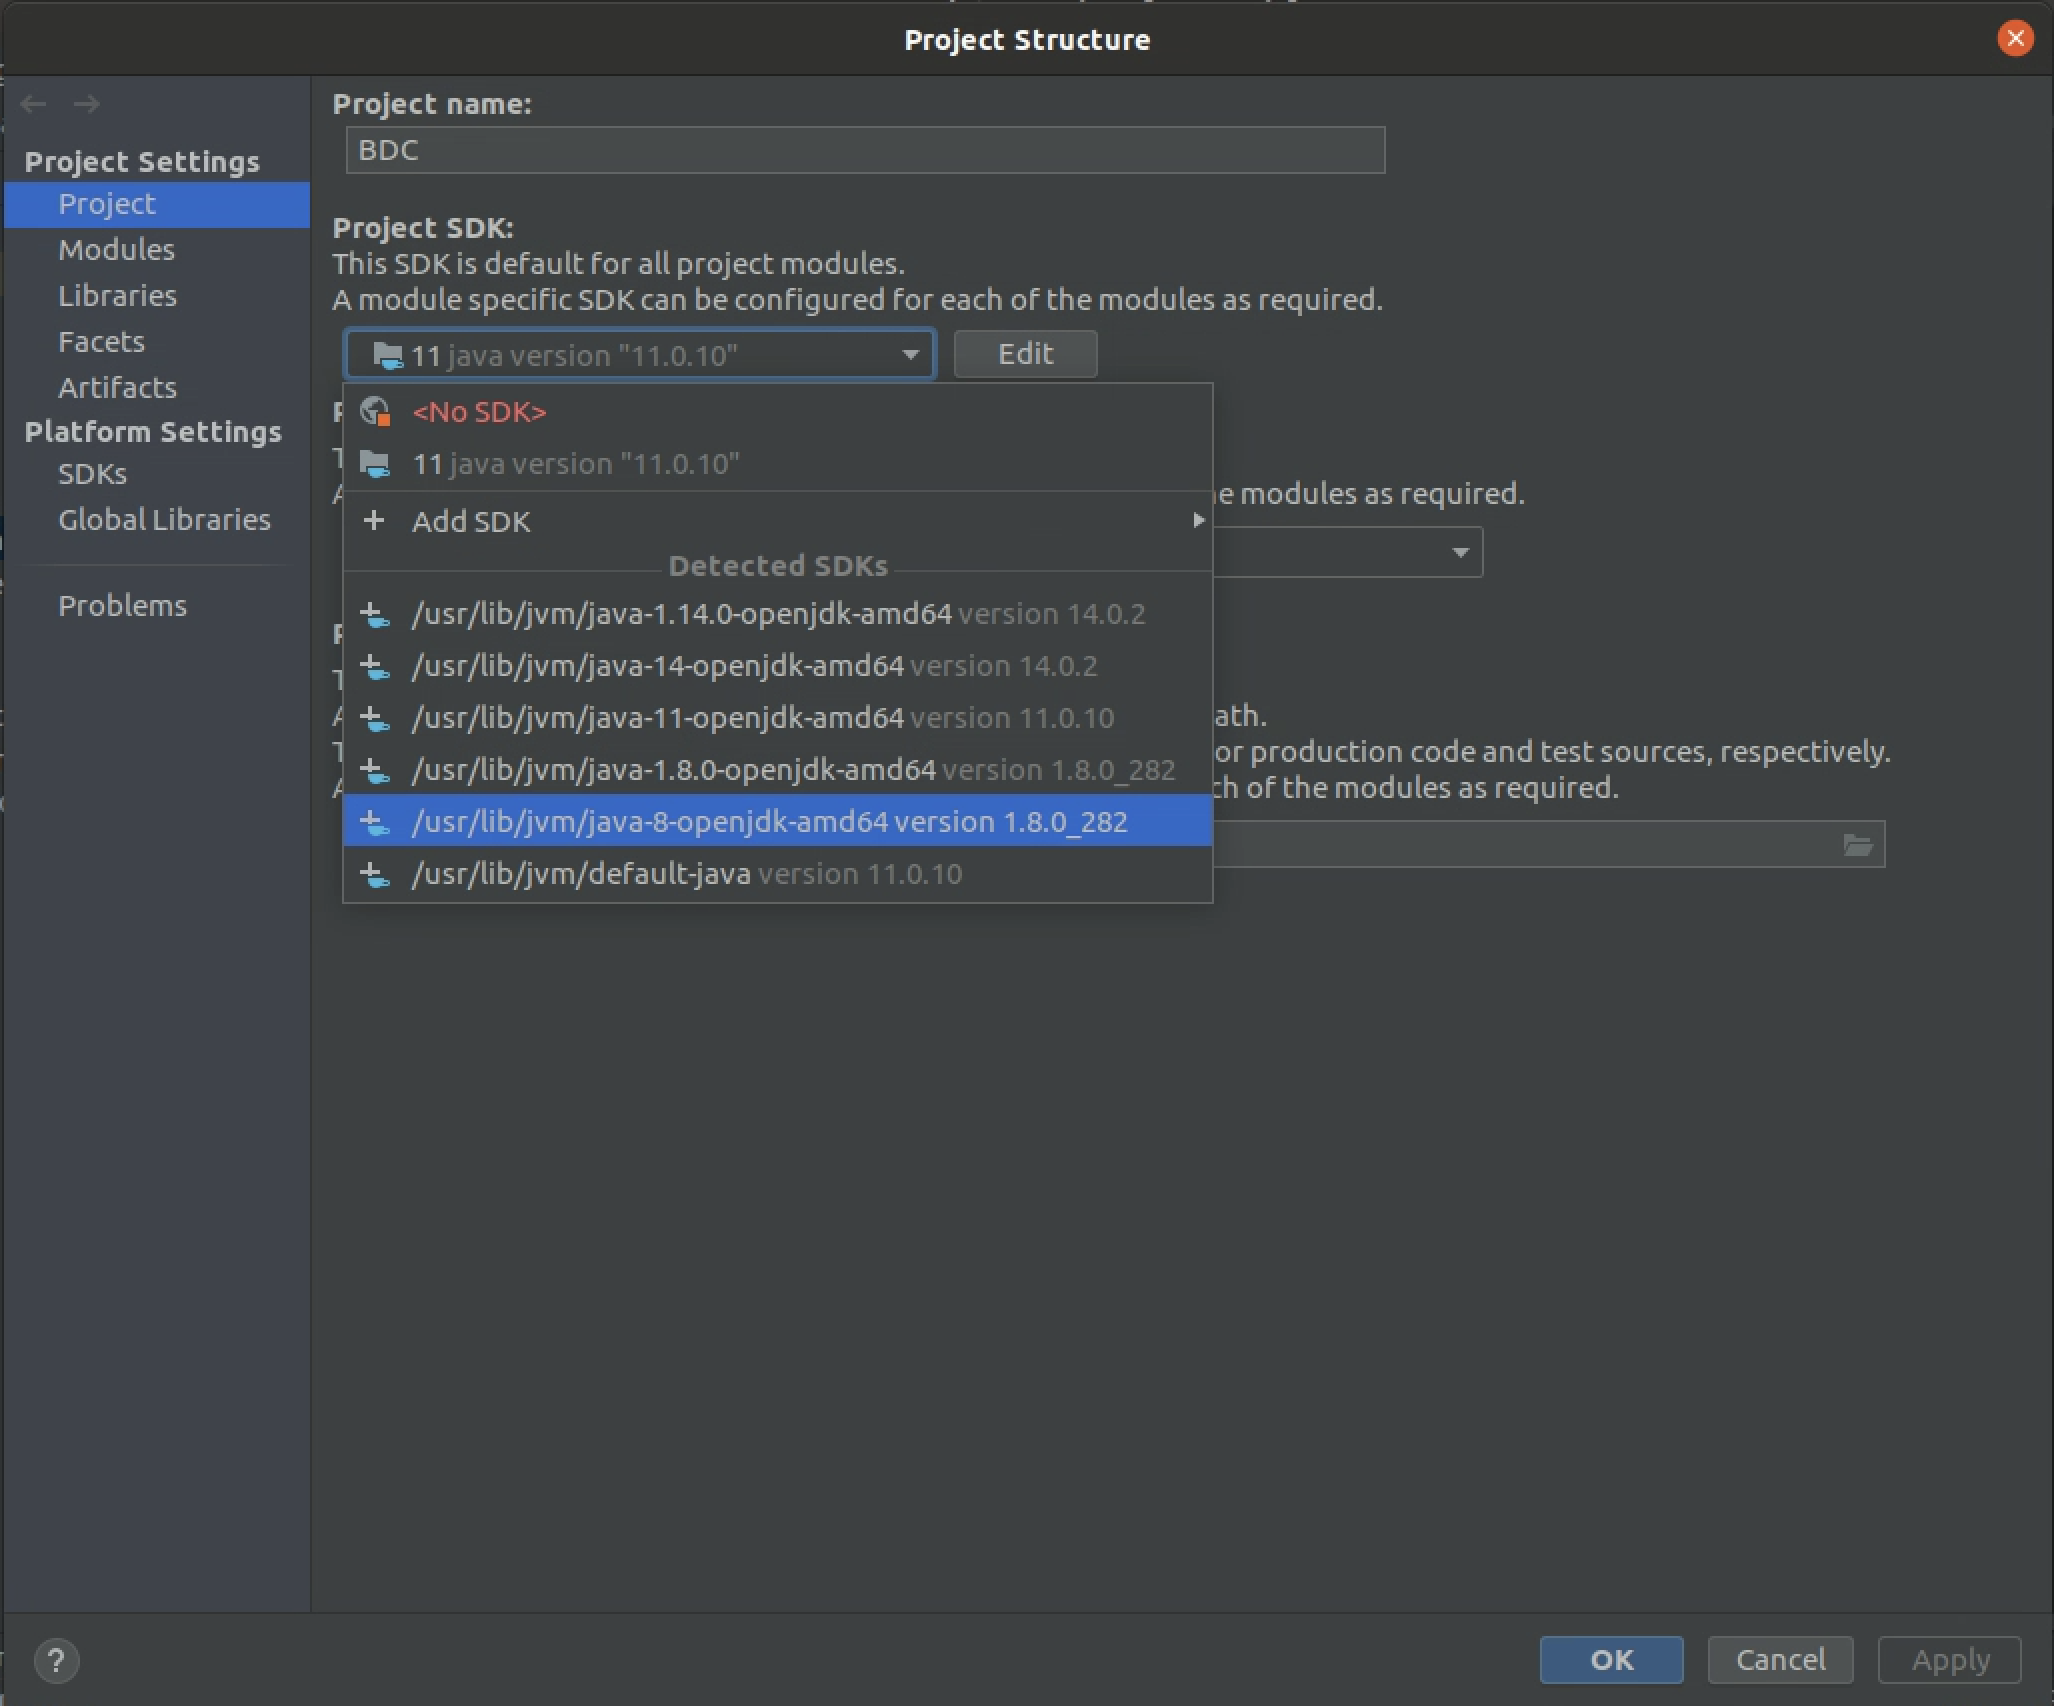
Open the menu File/Project Structure and select
Project from the left panel.
A window like the following one will pop up.
-
Open the drop-down menu and select the appropriate JDK, as in
the figure above. If in doubt,
pick Java 8.
At this point all errors will disappear.
If you see no errors in the editor, then you can skip the previous steps.
-
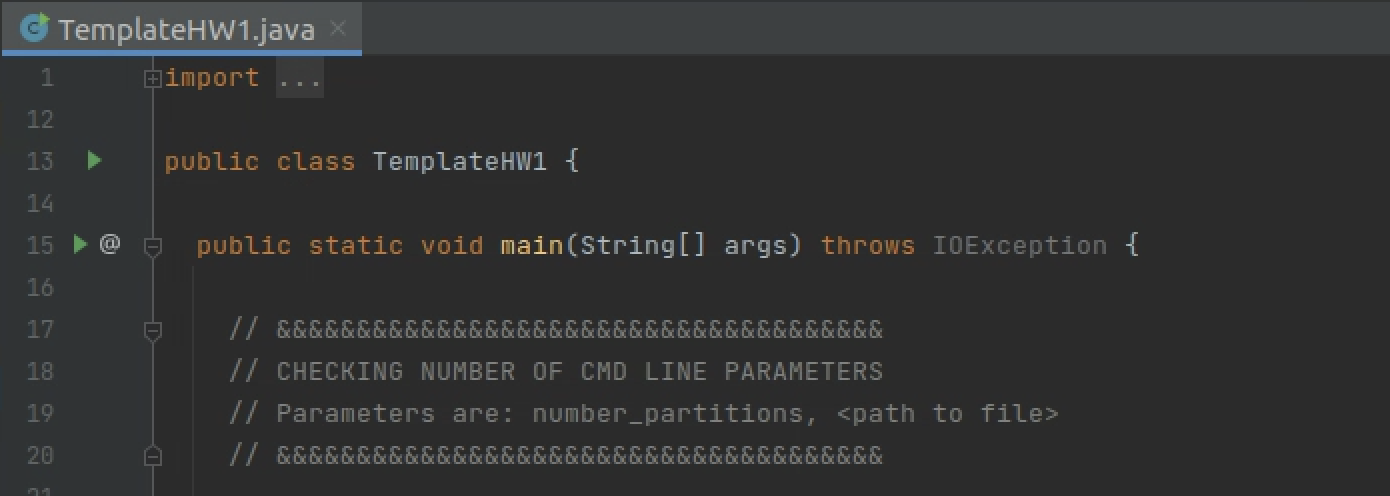
On the line of the main method there is a green arrow,
which allows you to run your code.
Clicking the green arrow will compile the code and run it.
The run will not succeed (exit code 1 at the bottom of the screen)
since you must configure a set of execution
parameters. To do so, use the drop-down menu on the top-right
of the Intellij window, where the name of the program (TemplateHW1,
in the example) appears, and select Edit Configurations to
get a dialog window which you must fill as indicated in the following image
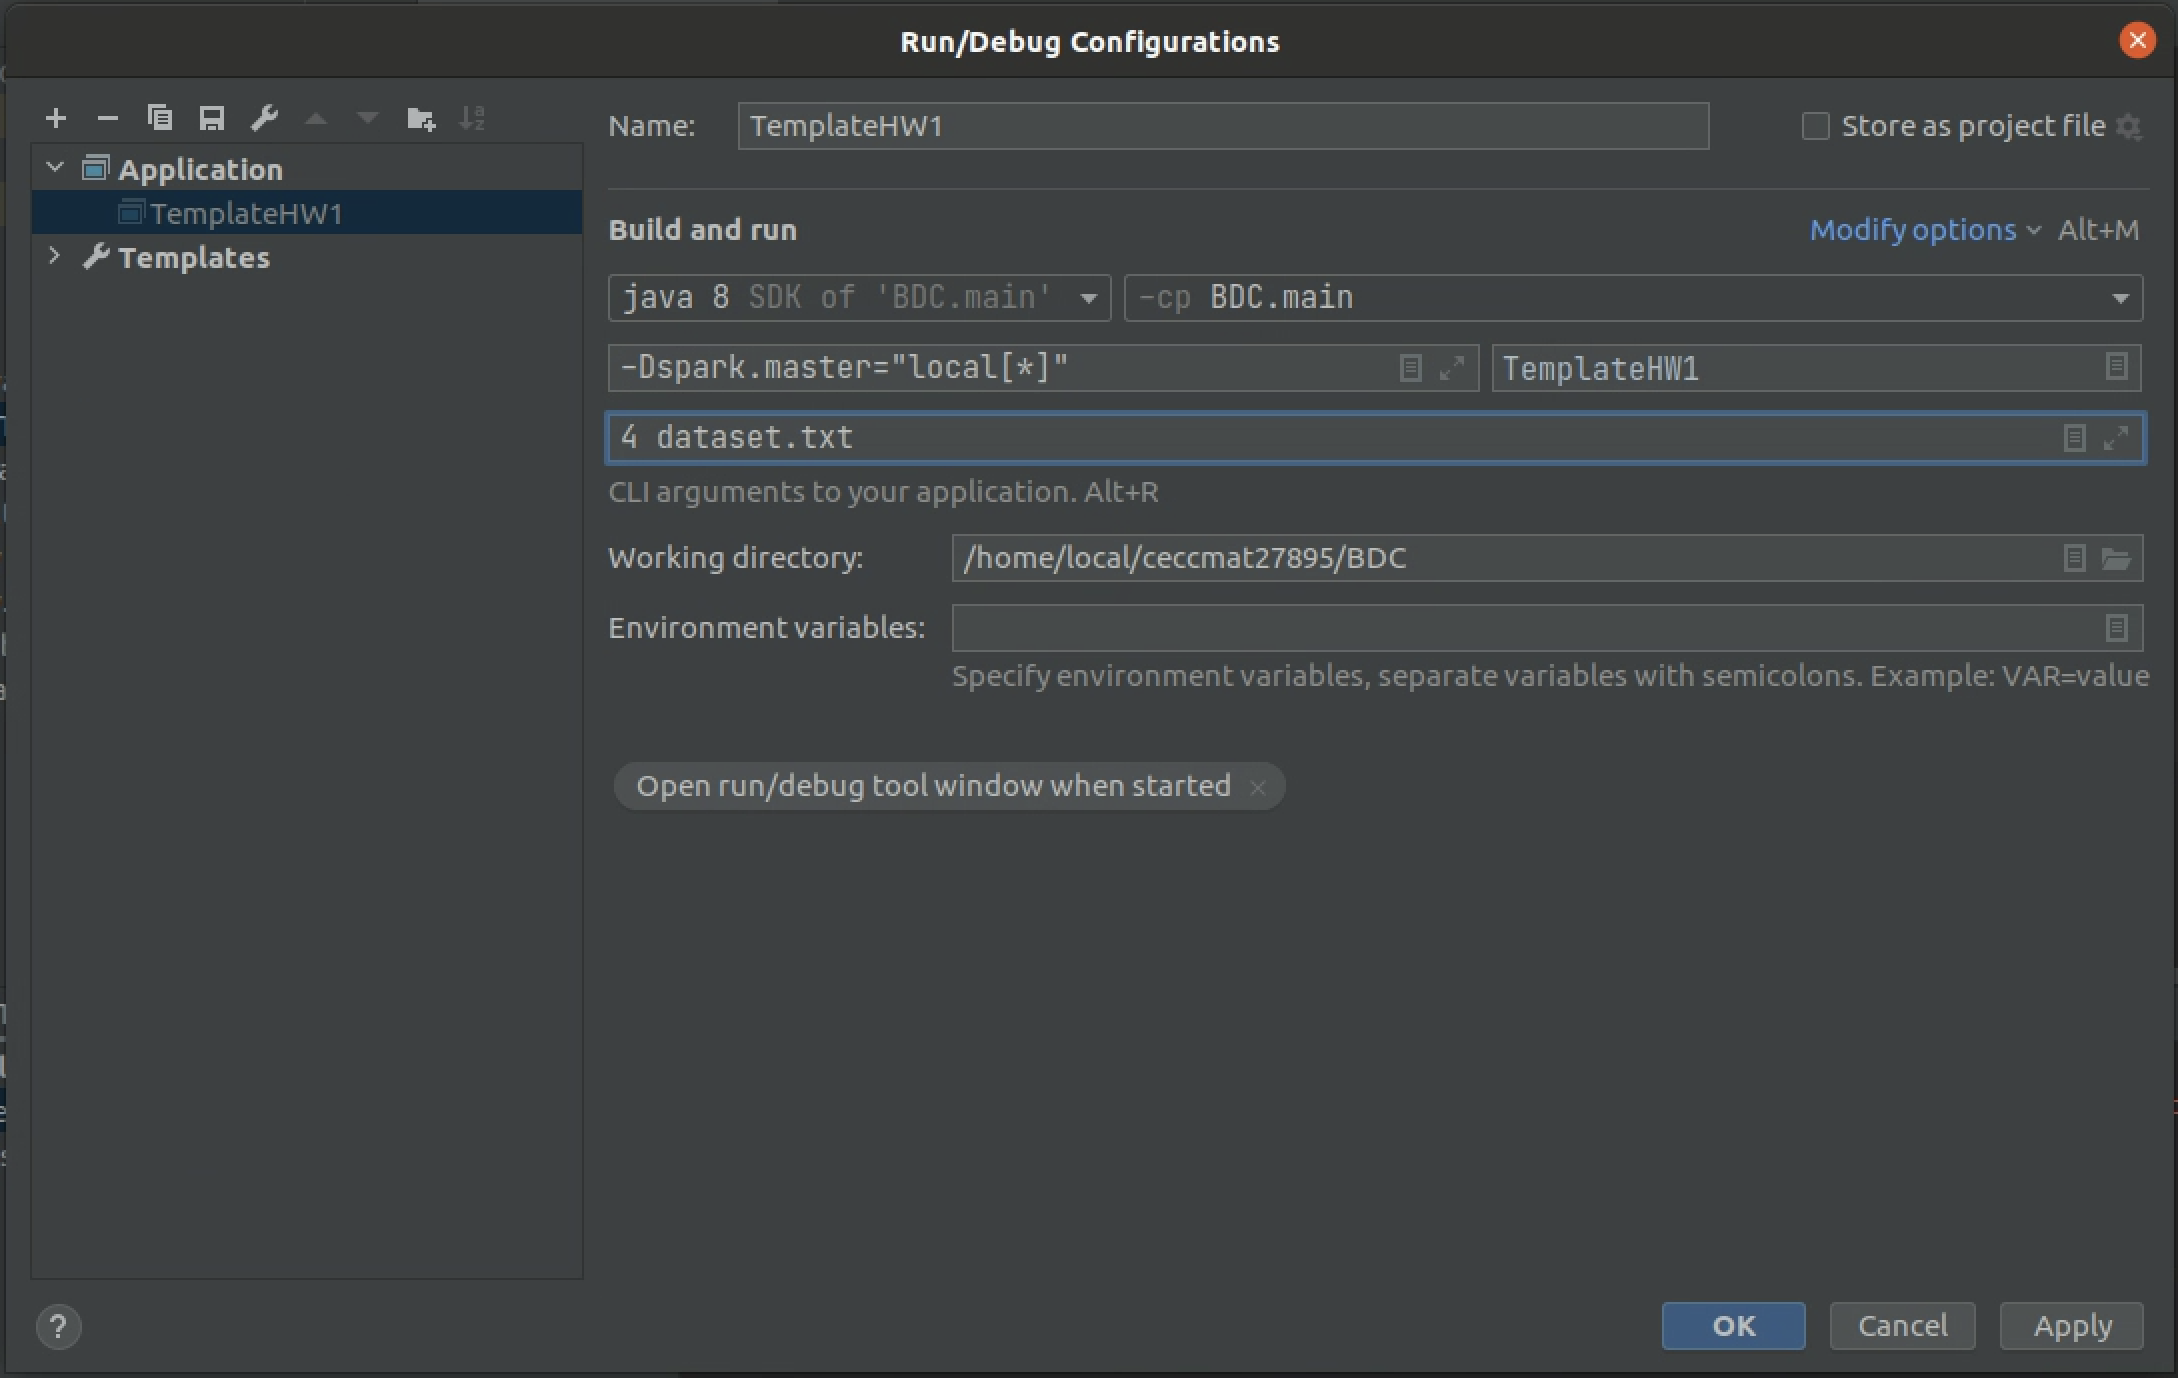
Note that the VM options field (where the spark.master property is set) may be hidden, and must be retrieved
by clicking on the Modify options blue text.
Specifically, VM options specify that you want to run Spark in
local mode (spark.master is a java system property), while
CLI arguments to your application
are the arguments passed to the main method
(an integer 4 and a file dataset.txt, in the example).
Instructions for Python users
If you are working in the Virtual Machine you can
skip this step, as the software is already installed.
Spark also exposes a Python interface. To use Spark from Python on
your local machine, follow
these instructions, which were
created by a colleague of yours in a previous edition of the class.
|